
Learn More About Tiny Homes
Tiny Home Adventures!
What are Tiny Houses? The Tiny House Movement? Tiny Living?
Simply put, it’s a social movement where people are downsizing the space that they
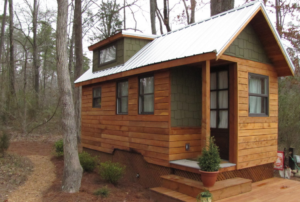 live in. The typical American home is around 2600 square feet, while the typical small or tiny house is around 100-400 square feet. Tiny Houses come in all shapes, sizes and forms but they focus on smaller spaces and simplified living.
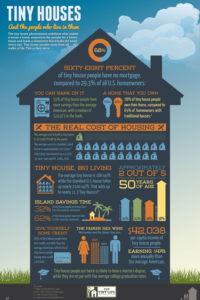
People are joining this movement for many reasons, but the most popular reasons are because of environmental concerns, financial concerns and seeking more time and freedom. For most Americans, 1/3 to 1/2 of their income is dedicated to the roof over their heads; this translates to 15 years of working over your lifetime just to pay for it and because of it, 76% are living paycheck to paycheck. So what is the alternative? One might be to live smaller. While Livingston Farm doesn’t think tiny houses are for everyone, there are lessons to be learned and applied to escape the cycle of debt, where almost 70% of Americans are trapped right now.
 This is a growing movement, that is for sure! With international attention on CNN, AP, Guardian, Huffington Post, NBC, Oprah, PBS and so many more people have come to know about another way to live their lives.
The tiny house phenomenon redefines what makes a house a home, empowers the people for a better future and leads to movement that breaks the mold every day. The tiny home phenomenon redefines what makes a house a home, they empower the owner for a better future and lead to movement that breaks the mold every day. Tiny house people come from all walks of life. With the cost of affordable housing rising every day, it makes sense to look at other options for their living accommodations. A tiny house built by Livingston Farm is the perfect solution for this growing trend. Your tiny house can serve as the perfect vacation home, guest house, office, studio, or a place to call your own.
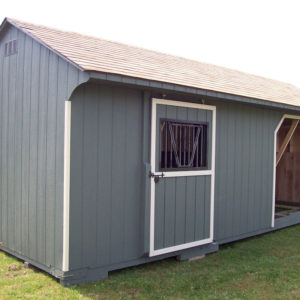
Our Quality-All of our buildings are constructed with high-quality materials and include free installation, innovative engineering and design, and an industry-leading 1 year warranty coverage. We’ve been bringing quality-made outdoor structures, tiny homes, guest homes and cottages to happy customers throughout Vermont for the past 10 years and we’re ready to help you make the most of your living space. Our tiny homes have been thoroughly tested to assure they are safe and built to industry standards.
Customizations-Let your imagination run wild! When we combine our expertise with your dreams, we can build a home you will entertain in for years. Livingston Farm will design the
 outer walls of your tiny home and partnered with a contractor of your choice, we can actualize every detail of your wish list. Our tiny homes can be built as one-story or two-story homes. Your idea of having your own “space away” is our specialty. Let us help you enjoy building a home that meets all of your needs.
 Delivery-If you choose one from our in-stock buildings, your tiny home can be delivered within days! If you want to design your own, we begin building as soon as your order is placed. You can have it delivered and begin your inside finishing work in just a few weeks! Every Livingston Farm tiny home includes free delivery and on-site installation within 50 miles. We have specialized equipment to deliver your home onto your property with minimal damage to your lawn or property surface. Livingston Farm can place your home on a basement, crawlspace, or slab foundation. Please call or email us to setup and coordinate your next tiny home delivery today.
Livingston Farm Team-We’re a local Vermont company of builders, landscapers, gardeners, excavators, designers, and stone masons. That combination means that each one of us can help you find solutions to the most complex home or business challenge. We are eager to help you with any project you may have, as if it were our own. We can deliver, install, prepare the site, and remove any other obstacles (upon request) as a team. We look forward to working with you to create your dream home.
Vermont Company-As a local Vermont business, we hire people with a better understanding of the products we sell, build and deliver. We take more time to get to know our customers and stand by the quality of our products and service. Here at Livingston Farm, we proudly support local Vermont and USA made products.
October 5, 20162Trees That Provide the Best Shade
Find Out Which Trees Provide The Best Shade with Livingston Farm
Fast Growing Shade Trees
Hot hot hot! Summer temperatures are here and Livingston Farm is here to help! Many areas across the nation are experiencing temperatures around 90 degrees and above, along with prolonged dry periods. This is great for days by the pool or out on the lake, but what about your garden?
It is often easy to assume that the conditions in northeastern climates are tough for plants to survive in. However, there are multiple varieties of drought tolerant plants and trees big and small that will thrive in the heat, even with little to no water. These plants will turn your dry landscape into a relaxing oasis. Livingston Farm carries some of the best cow-manure compost and topsoil in Vermont! We have exactly what your trees need to start their healthy life!

The Gingko Tree provides months of colors with their unique, heart shaped green leaves that turn a vibrant shade of golden yellow in the fall. They glow in the landscape while other plants are entering dormancy.
Worried about a smell? Don’t be. Male Ginkgo varieties don’t produce fruit so they don’t produce the same smell that female Ginkgo trees have.
These trees can be grown anywhere. They’re cold hardy up to growing zone 3 and will survive harsh, snowy winters. They are also smog tolerant, making them perfect for urban areas. Most importantly, they are drought tolerant and heat resistant, so not even the blazing sun or scorching heat will stop Gingko Trees from thriving.
Chinese Pistache trees should not be overlooked, because they add beauty and functionality to the landscape. They have thick, green canopies that create shaded areas beneath them that are perfect for hanging out under during hot days.
 These are tough and low maintenance. They will tolerate urban smog and pollution, and will adapt to a variety of poor soils that are sandy or heavy in clay. Landscapers flock to Chinese Pistache trees because they’re one of the most heat resistant fall foliage trees available, with a high level of drought tolerance. It’s an ornamental tree that nearly impossible to kill.
In the fall, their green leaves turn multiple shades of red, orange and yellow for a vibrant fall foliage display. By growing to about 25 to 35 feet tall, they’ll be noticed all over the neighborhood and recognized as one of the most beautiful trees.
Phenomenal Lavender bushes only grow to about three feet tall, so they will never outgrow an area with limited space. Even though their size is little, their personality is big.
By blooming for months every summer Lavender illuminates the landscape with tons of purple flowers. The flowers have a sweet fragrance that fills the summer air.
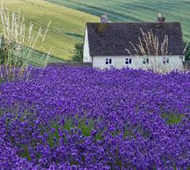 It often attracts butterflies and hummingbirds, which are a delight to watch.
It’s always great to have this lavender variety on hand because it naturally keeps mosquitoes away. In the summer during barbecues or family reunions your guests won’t have to use harmful chemical sprays.
Best of all,
 Phenomenal Lavender is incredibly low maintenance. It’s the hands-free flowering shrub with a high level of drought tolerance and heat resistance, so it will continue to bloom and thrive during the hottest heat waves of the year.
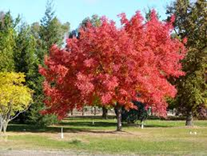
There is little to no wait with the American Red Maple. It grows up to three feet per year, which is a rapid growth rate. Forget waiting for a large, beautiful shade tree because you’ll almost instantly have a mature maple tree. The American Red Maple is recommended for growing zones 4 through 9 and will adapt to a variety of poor soils, while also being urban tolerant. They will clean and filter the air in smoggy city areas.
Most importantly, the American Red Maple is beautiful. It has a thick canopy filled with lush green leaves that create a shaded area beneath it that’s perfect for hanging out under during a warm sunny day. In the fall the green leaves turn a shade of bright red for a vibrant fall foliage display that can be seen from miles away.
When we get hot and thirsty, so do our plants, but that doesn’t mean that you have to take a break from gardening and improving your landscape du
 ring the summer. There is a large variety of heat resistant and drought tolerant trees that will laugh at the heat while providing beauty all summer long.
Adding trees to your landscape can bring about fresher air, privacy, and shade to relax under, all while increasing your property value. It’s no secret that a beautiful landscape can increase the value of a home, while benefiting your neighborhood with vibrant green hues for everyone to enjoy.
You can find the right tree for your landscape for any project, from needing a living privacy fence to planting ornamental flowering trees in your landscape. No matter what you’re looking for, consider a tree with a rapid growth rate in order to have a full bodied, mature tree in your yard, without waiting for years before your tree takes off. If you have any questions, Livingston Farm is here to help!
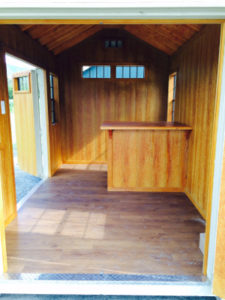
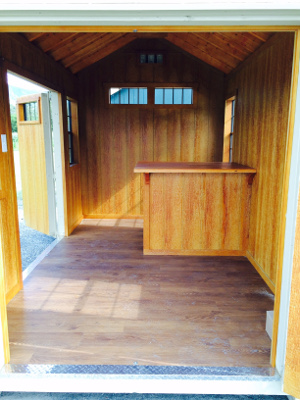
The New Bar-Shed
Turn Your Shed into the Hottest Hangout Spot with a New Bar-Shed
The new home and garden trend is sweeping the internet, and it’s actually pretty amazing and doable. We’ve seen she-sheds and man-caves but the BackYard Bar Shed puts a different spin on making the most out of your shed. Bar sheds are popping up all over the place, and some of them are pretty darn creative. With a wide array of different options, this is one of the least dau
 nting projects we’ve come across in a while. Let us build the shed and you can customize the inside.
Backyard Watering Hole
The fun thing about bar sheds is that you can get as creative and elaborate as you’d like. Plus, it gives you a place to put all of those beer mirrors and bar games you’ve been storing in your garage since your college days.
What comes to mind when you hear the phrase “bar shed?” I’m guessing many of you have never heard that phrase. It’s so simple, yet until we built our first one, I’d never heard of them, let alone walked inside of one.
It’s pretty genius, right? When we had a customer send us a picture asking us to build it, I was blown away. How have I never thought of this? I wondered. You’ve got a private area, outdoors (yet still covered), disconnected from your regular living space. An attainable retreat at almost anytime. It’s perfect.
How it all began…
From what I’ve learned, the trend started because everyone has their fresh fruit and vegetable gardens and they needed a shed to be outside near their garden retreat. Many people have sheds for storing gardening tools but that’s their only purpose; to keep a $5 rake safe. Naturally, folks started enjoying a quick beer or cocktail in these sheds, and eventually, a few people gathered, mini happy hours casually formed, and from there, the natural evolution of bar sheds began.
This trend has been taking off for many years in the UK, and it’s now starting to pick up steam in the US as well. Many home brewers use their sheds on brew day and refer to the space as a “brew shed.” And of course, we’ve all seen a backyard shed fitted with tiki decor.
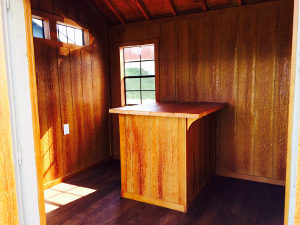
We even have a family member who has a bar shed. He doesn’t call it that, and I never realized it until writing this article, but it’s the size, shape, and build of a standard shed, located near their pool. It houses all of the pool supplies, alongside a nice 4-person bar, a beer fridge, and a sizable selection of other adult beverages.
It was right in front of my eyes all this time. I just never really thought of it as a bar shed.
Start Creating!
After all, it’s a great way to re-purpose a storage space (if yours is just gathering dust and junk), an awesome venue for small get-together with friends, and a perfect refuge for you and the people you live with when you need a few hours apart. Here at Livingston Farm we can create your next backyard bar shed, it’s up to you to dream!
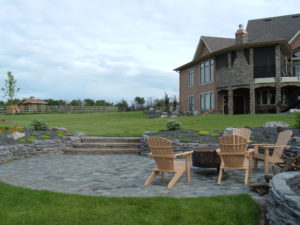
Natural Stone Pavers vs Concrete Stone Pavers
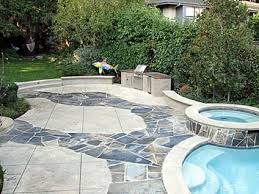
NATURAL STONE vs CONCRETE STONE PAVERS
One of the biggest decisions you will make about your landscape is which hardscape material to choose for your patio and other outdoor areas. Unlike plantings and furniture, hardscape materials are not easy to change once they are installed, so it’s a big commitment. Many of our customers ask us, “What is the best hardscape material for my new landscape?”
It’s not an easy answer. It really depends on your style, vision and budget. And you have two very distinct choices when it comes to hardscape materials from Livingston Farm.
To help you decide which hardscape material is the best choice, we’re going to discuss concrete pavers vs. natural stone.
Your patio is where you’ll spend most of your time in your landscape, so you’ll want to pick a hardscape material that creates the right atmosphere for your landscape design.
What Style Are You Looking For?
As you think about your patio function and size, you’ll want to consider what each material offers and how that fits in your overall landscape design.
Do you want a symmetrical or more natural look? Do you want colors that blend with or contrast the colors of your home?
Hardscaping materials come in a variety of colors and textures. Some materials are more suited for traditional and historical homes while others are perfect for modern and contemporary designs. For installations in your community and the surrounding areas, you’ll need to be sure the materials you pick hold up in various weather conditions with installation.
And in some cases, you may want to blend pavers and natural stone pavers to create accents, patterns, borders or even combine a mixture of sizes and contrasting shapes.
Now that you’ve determined the look of your patio, here are the hardscaping materials you need to consider.
Concrete Pavers
Concrete pavers offer a multitude of style choices — from modern to classic —they are beautifully suited to many patios, outdoor kitchens and pool areas and offer many choices for designs. Classic style pavers mimic the look of brick and are a popular choice for traditional and historic style homes because it is the ideal paving material if you want to create an established and authentic look. But the modern style — with irregular shapes and precision cuts — can be used in Vermont landscapes as they are adaptable for more contemporary designs.
Traditionally rectangular in shape, Concrete pavers can also be irregular or square shaped and laid in many patterns including herringbone, basket weave and even circular patterns. The biggest advantage to concrete pavers is the variation of colors — from white wash to grays and browns to reds — so you can choose to mix and match colors or alternate depending on your pattern.
Concrete pavers are ideal for Vermont climate because they can rise with the winter freeze and settle back into place during the summer thaw, allowing them to “flex” with the temperatures, whereas regular concrete would crack. If any damage does occur, pavers can also be pulled up in isolated sections and re-laid without tearing out the entire area.
Concrete pavers can start at $4.77 per square foot to purchase depending on the size of the project, access, slope, shape and other variables.
Natural Stone Pavers
It can be difficult to choose the best stone for patios — as you have a lot of options when it comes to natural stone pavers. You can choose flat-topped uniform stone or rough-edged irregular shapes. Natural stone pavers can be made of slate and flagstone— colors vary naturally and offer a rich, textured, earthy appearance. Vermont stone’s natural colors skew more towards greens, greys and blacks.
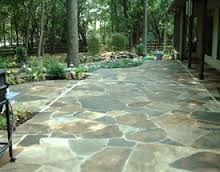 The type of natural stone you choose depends on the look and feel of your patio and landscaping. Irregular flagstone can create a gorgeous, rugged look with a lot of detail, while uniform dimensional stone offers more linear and symmetrical patterns.
Natural stone pavers will start around $8.25 per square foot to purchase depending on the size of the project, access, slope, shape and other variables.
So, Concrete Pavers vs. Natural Stone?
Your patio will be where you will spend most of your time outdoors. Whether you are hosting outdoor parties or just enjoying a relaxing day around the pool, your choice in materials will most often reflect your home’s style and architecture. And there are many other factors to consider when you are comparing concrete pavers vs. natural stone— including price, design options and maintenance.
And your patio might not be the only hardscaped feature in your yard. Hardscape materials can also be used in these areas to create retaining walls, outdoor kitchens, fireplaces and fire pits — and even paths, walkways and driveways. If your landscape has several of these elements, you may want to consider materials that can easily blend all of these elements together to create an inviting and natural atmosphere — and increase curb appeal.
The best way to determine which hardscape material is right for you is to come into our office at 40 South Route 116 Bristol, Vermont or check out our stone catalog online. Livingston Farm would be happy to help you pick the right shapes and patterns to build the patio, walkway or driveway of your dreams!
Keep Pesky Mosquitoes AWAY!!!

It’s summertime! The weather is warm and the sun’s shining. It’s time to break out the grills and invite all your friends and family over for summer parties.
Unfortunately, along with friends and family, come those pesky uninvited guests that you wish would just go away – forever! No I’m not talking about your crazy Aunt Georgina or that neighbor who shows up with empty hands and stays way too long. I’m talking about mosquitoes. Although it’s almost impossible to get rid of all mosquitoes from your property, here are a few steps you can take to help limit the amount of mosquitoes that will show up to party with you and your guests.
Limit Still Water On Your Property
The first thing you should do to cut back on mosquitoes is to eliminate their breeding grounds. Mosquitoes need water to breed. Stagnant water or moist soil is where adult mosquitoes lay eggs. By limiting water on your property, you’ll be less likely to be bothered by these pests. After a heavy rain walk around your property and make sure there isn’t any obvious standing water. If you have an area with standing water (more than a day or so after it rains) consider leveling off that area so the water drains. If you find your lawn being used as a delivery room for your next round of mosquito bites, Livingston Farm can help with all of your drainage struggles. Livingston Farm Excavation services can help with all of your earth moving needs. It’s important to make sure your lawn has proper drainage after rain storms, melting snow, and unknown runoff zones. Proper drainage supports the health of your lawn and your sanity of limiting your mosquito interactions.
Keep Your Things Under Cover to Eliminate Water Build
Up Keep all containers, such as recycling bins, garbage cans and other storage containers dry. Make sure to put holes on the bottom of the containers for drainage and not on the sides. Check your gutters to make sure they are free from debris so water does not build up in them. Also make sure the gutter drain is free from debris and standing water cannot build up around the drain. Check flower pot bases; water sitting in the bases is an often overlooked mosquito paradise. Change water in animal dishes outside and birdbaths at least once a day. If you find yourself with extra pots, gardening tools, and other odds and ends that collect water, Livingston Farm has outdoor structures that can hide all of your belongings away from your neighbors and pesky mosquitoes looking for a nest.
Earth Friendly Ways to Limit Mosquitoes
You might think of sprays and poison when it comes to keeping mosquitoes away, but Mother Nature has some remedies that can help the good fight against these pests. Plants like tansy, basil or marigolds are a great way to limit mosquitoes. The smell of these plants helps to keep mosquitoes from hanging around yards. Spraying Listerine around bushes and on the grass also helps to keep mosquitoes from joining the party. Garlic (in liquid form) is another item you can spray on your property to help deter mosquitoes. In addition, there are organic and natural mosquito sprays that connect to your garden hose. Be sure to read labels to make sure they are pet and kid friendly. If you prefer to leave the planting and sprays for another day, Livingston Farm can build you a beautiful screened in gazebo to create the safest line of defense for you and your family to stay out of reach for your unwanted BBQ guests.
Candles & Dimmed lights Can Deter Mosquitoes
Mosquitoes love light. So, changing out bright white lights to dimmer yellow lights is a quick fix to help cut down on mosquitoes. Citronella candles and torches are also easy ways to keep mosquitoes away.
Other Ways to Eliminate Unwanted Flying Friends
If you spend a lot of time outside and want to make an investment, mosquito traps or mosquito magnets are your top choice. These traps use propane and octenol to mimic human breath, which
 mosquitoes like, and it traps and kills them. However, these units can run up to $800, so bring your wallet if you choose to go this route.
Easing the Pain of Your Bites
Even if you follow these tips, unfortunately you’ll probably still end up with a few bites over the summer. Unless you decide to stay inside your gazebo or outdoor shed forever…Don’t worry; there are a few things you can do to help ease the pain. The best way to stop the itch is to use products with antihistamines. A good home remedy is using the peel of a banana on fresh bites. This helps to take away the swelling and itch. And finally, the quickest way to stop a mosquito bite from itching is cool water.
Last thing, remember that mosquitoes are usually more active during dawn and dusk. Hopefully these tips will help to keep away most uninvited guests from your party or backyard BBQ. Sorry Livingston Farm can’t help you with that crazy Aunt or unwanted neighbor from down the street.
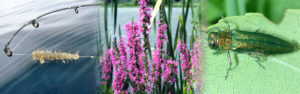
Invasive Plants of Vermont
Now that summer is here and your itchy gardener fingers are able to get their exercise, it’s time to make sure you have a garden that is Vermont friendly to you and your furry house guests.
We’re all beginning to enjoy the oodles of blooming beauties accenting our prized emerald landscapes.
While there are almost limitless options for your planting beds and borders, some plants you should flat-out avoid:
- Invasive plants in Vermont State that take over like sinister scoundrels, choking out beneficial plants the ecosystem needs.
- Plants that attract ravenous, garden-clearing deer and cute, but dastardly munching bunnies.
- And plants that look pretty, but are toxic to your furry pets.
Yes, you might spy a couple of your favorites here. But trust us — there are plenty of alternatives to these garden bad guys. We’ll even give you some ideas.
First, A Better Understanding Of Invasive Plants
Invasive plants spread aggressively outside their normal range, multiplying like crazy because their new environment lacks the insects, diseases, hungry animals and competition from other plants that keep them in check in their native habitat.
They may look lovely and innocent in your backyard, but invasive plants can pose a serious environmental threat. As they spread, these garden bad guys crowd out native plant communities, which harms the rest of the ecosystem.
When we say garden bad guys, we mean actual outlaws. New regulations went into effect in March 2015 in across the nation that ban the sale, purchase and transportation of a long list of invasive plants that have been causing a ruckus throughout the nation’s landscapes for decades.
Brace yourself. The list of 143 invasive plants — you can see the complete list — might include some of your favorites, including Norway maple, burning bush, Dame’s Rocket, purple loosestrife, garlic mustard, and several types of honeysuckle.
A popular vine on the list is: Asiatic or Oriental bittersweet. It probably came here innocently enough, when backyard gardeners decided they’d look pretty on their trellises. Now you can see this invader smothering trees along the highway.

 Invasive Plants in Vermont — The Big No-Nos
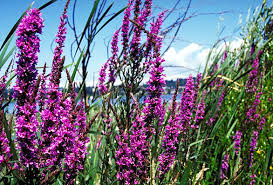
One captivating plant you should definitely avoid is purple loosestrife. It’s lovely, with tall purple spires. Look away.
Brought to New England as an ornamental plant in the 1800s, purple loosestrife has tiny seeds that spread like crazy in wind or water.
Massive drifts of the purple flower grow to thousands of acres in size, crowding out crucial open-water habitat for butterflies and amphibians.
What to plant instead? Blazing star has spiked, pink-purple flowers and offers nectar for many native species of butterflies and other insects. These plants make wonderful highlights lining any walkway or patio.

Instead of invasive Oriental bittersweet, plant American bittersweet. It’s a native species that looks very similar, with pretty orange berries, but doesn’t grow out of control.
Love Japanese barberry? Good substitutes for this pretty, but invasive shrub are Weigela ‘Midnight Wine,’ with its dark burgundy foliage —and the low-growing cotoneaster.

 Plants That Attract Munching Wild Critters
Why is it that your favorite garden lovelies are also the plants that summon hungry deer to an all-you-can-eat buffet? Like you, deer apparently have good taste. Actually, they’ll eat just about anything. Here are a few of their favorites to avoid, and the deer-resistant plants you can grow instead:
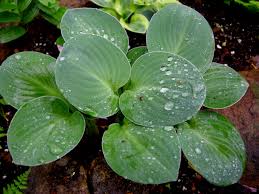
Hostas
We know, we know. Everybody loves hostas, those hardy, beautiful lovers of shade. But deer devour them, right down to the nub.
What to plant instead?
Brunnera. This is a shade plant you might not have heard of, but some varieties, like ‘Jack Frost,’ boast stunning variegated foliage that fill in great for hosta. It offers clusters of pretty blue flowers in the spring.
Another good hosta alternative is lungwort. It sounds gross, but trust us — it’s a garden stunner, with silver speckled leaves that brighten up shady spots. It’s covered in coarse hairs, so deer tend to leave it alone.
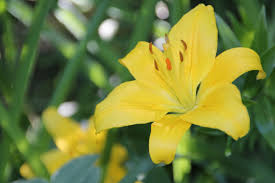
Lilies
Deer love lilies like toddlers love lollipops. What to plant instead?
Bee Balm is a showy perennial with bright flowers that attract hummingbirds and butterflies, but deer and rabbits say, “meh.”
Also try Golden Marguerite, with cheerful gold daisy-like flowers. It has fuzzy leaves that deer leave alone
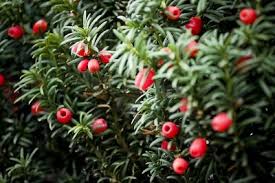
Yews
Munch, munch, munch — so long, pretty yews. Try these deer-resistant shrubs instead: spirea, potentilla, American holly.
Holly offers the same verdant green you get from yews. Spirea boasts delicate foliage and cascading branches of white or pink spring flowers, while potentilla brightens up your landscape with pretty buttercup-like flowers as early as June and as late October.
When Deer Say, “Yuck.”
In general, deer pass up plants with fuzzy or hairy foliage. Think lamb’s ear and lady’s mantle.
They also instinctively avoid plants that will upset their stomachs, including bleeding heart, poppies, daffodils and ferns.
Deer also crinkle their noses at heavily fragranced foliage. So herbs are your garden pals. Most herbs are both beautiful and deer-resistant, including sage, thyme, rosemary, oregano, lavender and others.
Ornamental grasses? Bingo. Deer find grasses tough to digest and don’t like their sharp edges.
These Plants May Be Harmful To Pets
Lots of common garden plants can be toxic to dogs and cats. Here are a few to talk with your landscaper about — and possibly avoid:
- azalea
- begonia
- chrysanthemum
- cyclamen
- daffodil
- gladiola
- hosta
- lilies
- morning glory
- tulips
Plant these colorful and safe annuals instead:
- petunias
- cosmos
- snapdragons
- zinnias
Pet-safe perennials include:
- bee balm
- phlox
- roses
- coneflowers
Download a list of all potentially toxic plants for pets.
Livingston Farm Knows The Right Plants
Our experts at Livingston Farm Landscape love finding the perfect annuals, perennials, shrubs and trees for your landscape, while avoiding invasive outlaws, critter salad bars and plants that could harm Bella or Max.
We’ve been accenting landscapes for more than 15 years, so we have a vast knowledge of plants, stones — and a number of tricks up our sleeve when it comes to finding great substitutes for plants that can harm the environment or your family pets.
At Livingston Farm, we’re about creating a better way of life. That means caring about the ecosystem, as well as beautifying it. If you have any questions, please contact us by phone, email, or feel free to stop by our Bristol, Vermont location!
10 Year Anniversary Open House Sale

Join us Friday, Saturday, and Sunday for our spring sale*
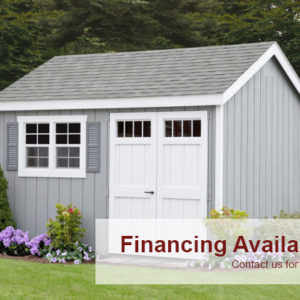
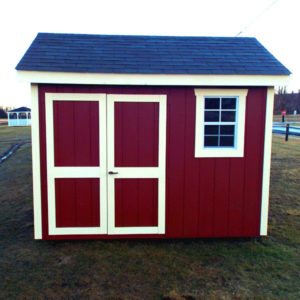
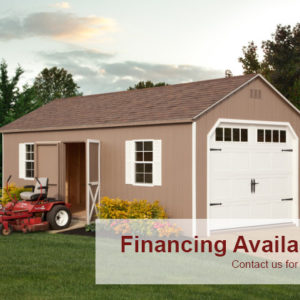
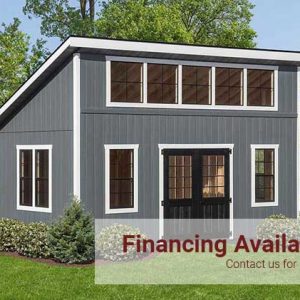
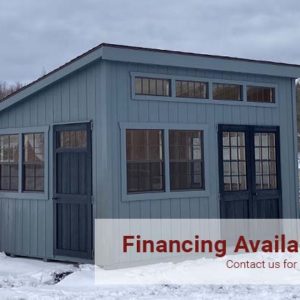
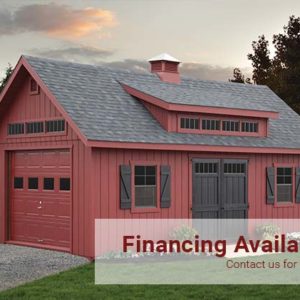
Come by Livingston Farm and say hello this weekend as we celebrate 10 years in business in beautiful Bristol, Vermont. Save on your next landscaping project with the great specials we have going on. Time is running out – drive over to our Bristol, VT location today.- 10% off all in stock sheds, barns, garages, chicken coops, horse barns and gazebos
- 10% off all playsets
- 15% off all palletized stone
- 15% off all garden accents and statuary
- 10% off all outdoor furniture
- 10% off all bulk landscape products
- Also clearance specials up to 75% off
*Sale prices apply only on 5/13/16 – 5/15/16.Home or Office Addition Vermont
Vermont Home or Office Additions at Livingston Farm

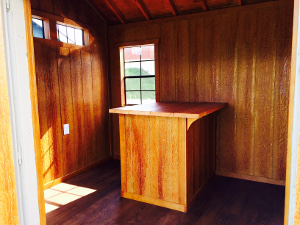
These days we all find ourselves needing more room. Whether it be for more storage, for visiting or growing family, or just wanting a space at home for projects, an office or a study. Whatever your reason for needing more space, a great and economical way of getting more elbow room is to consider a customizable building as an addition to your home or business.
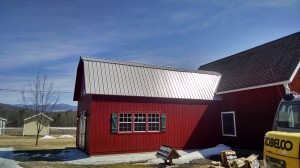
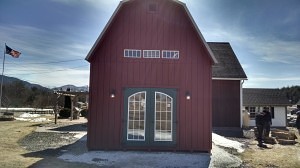
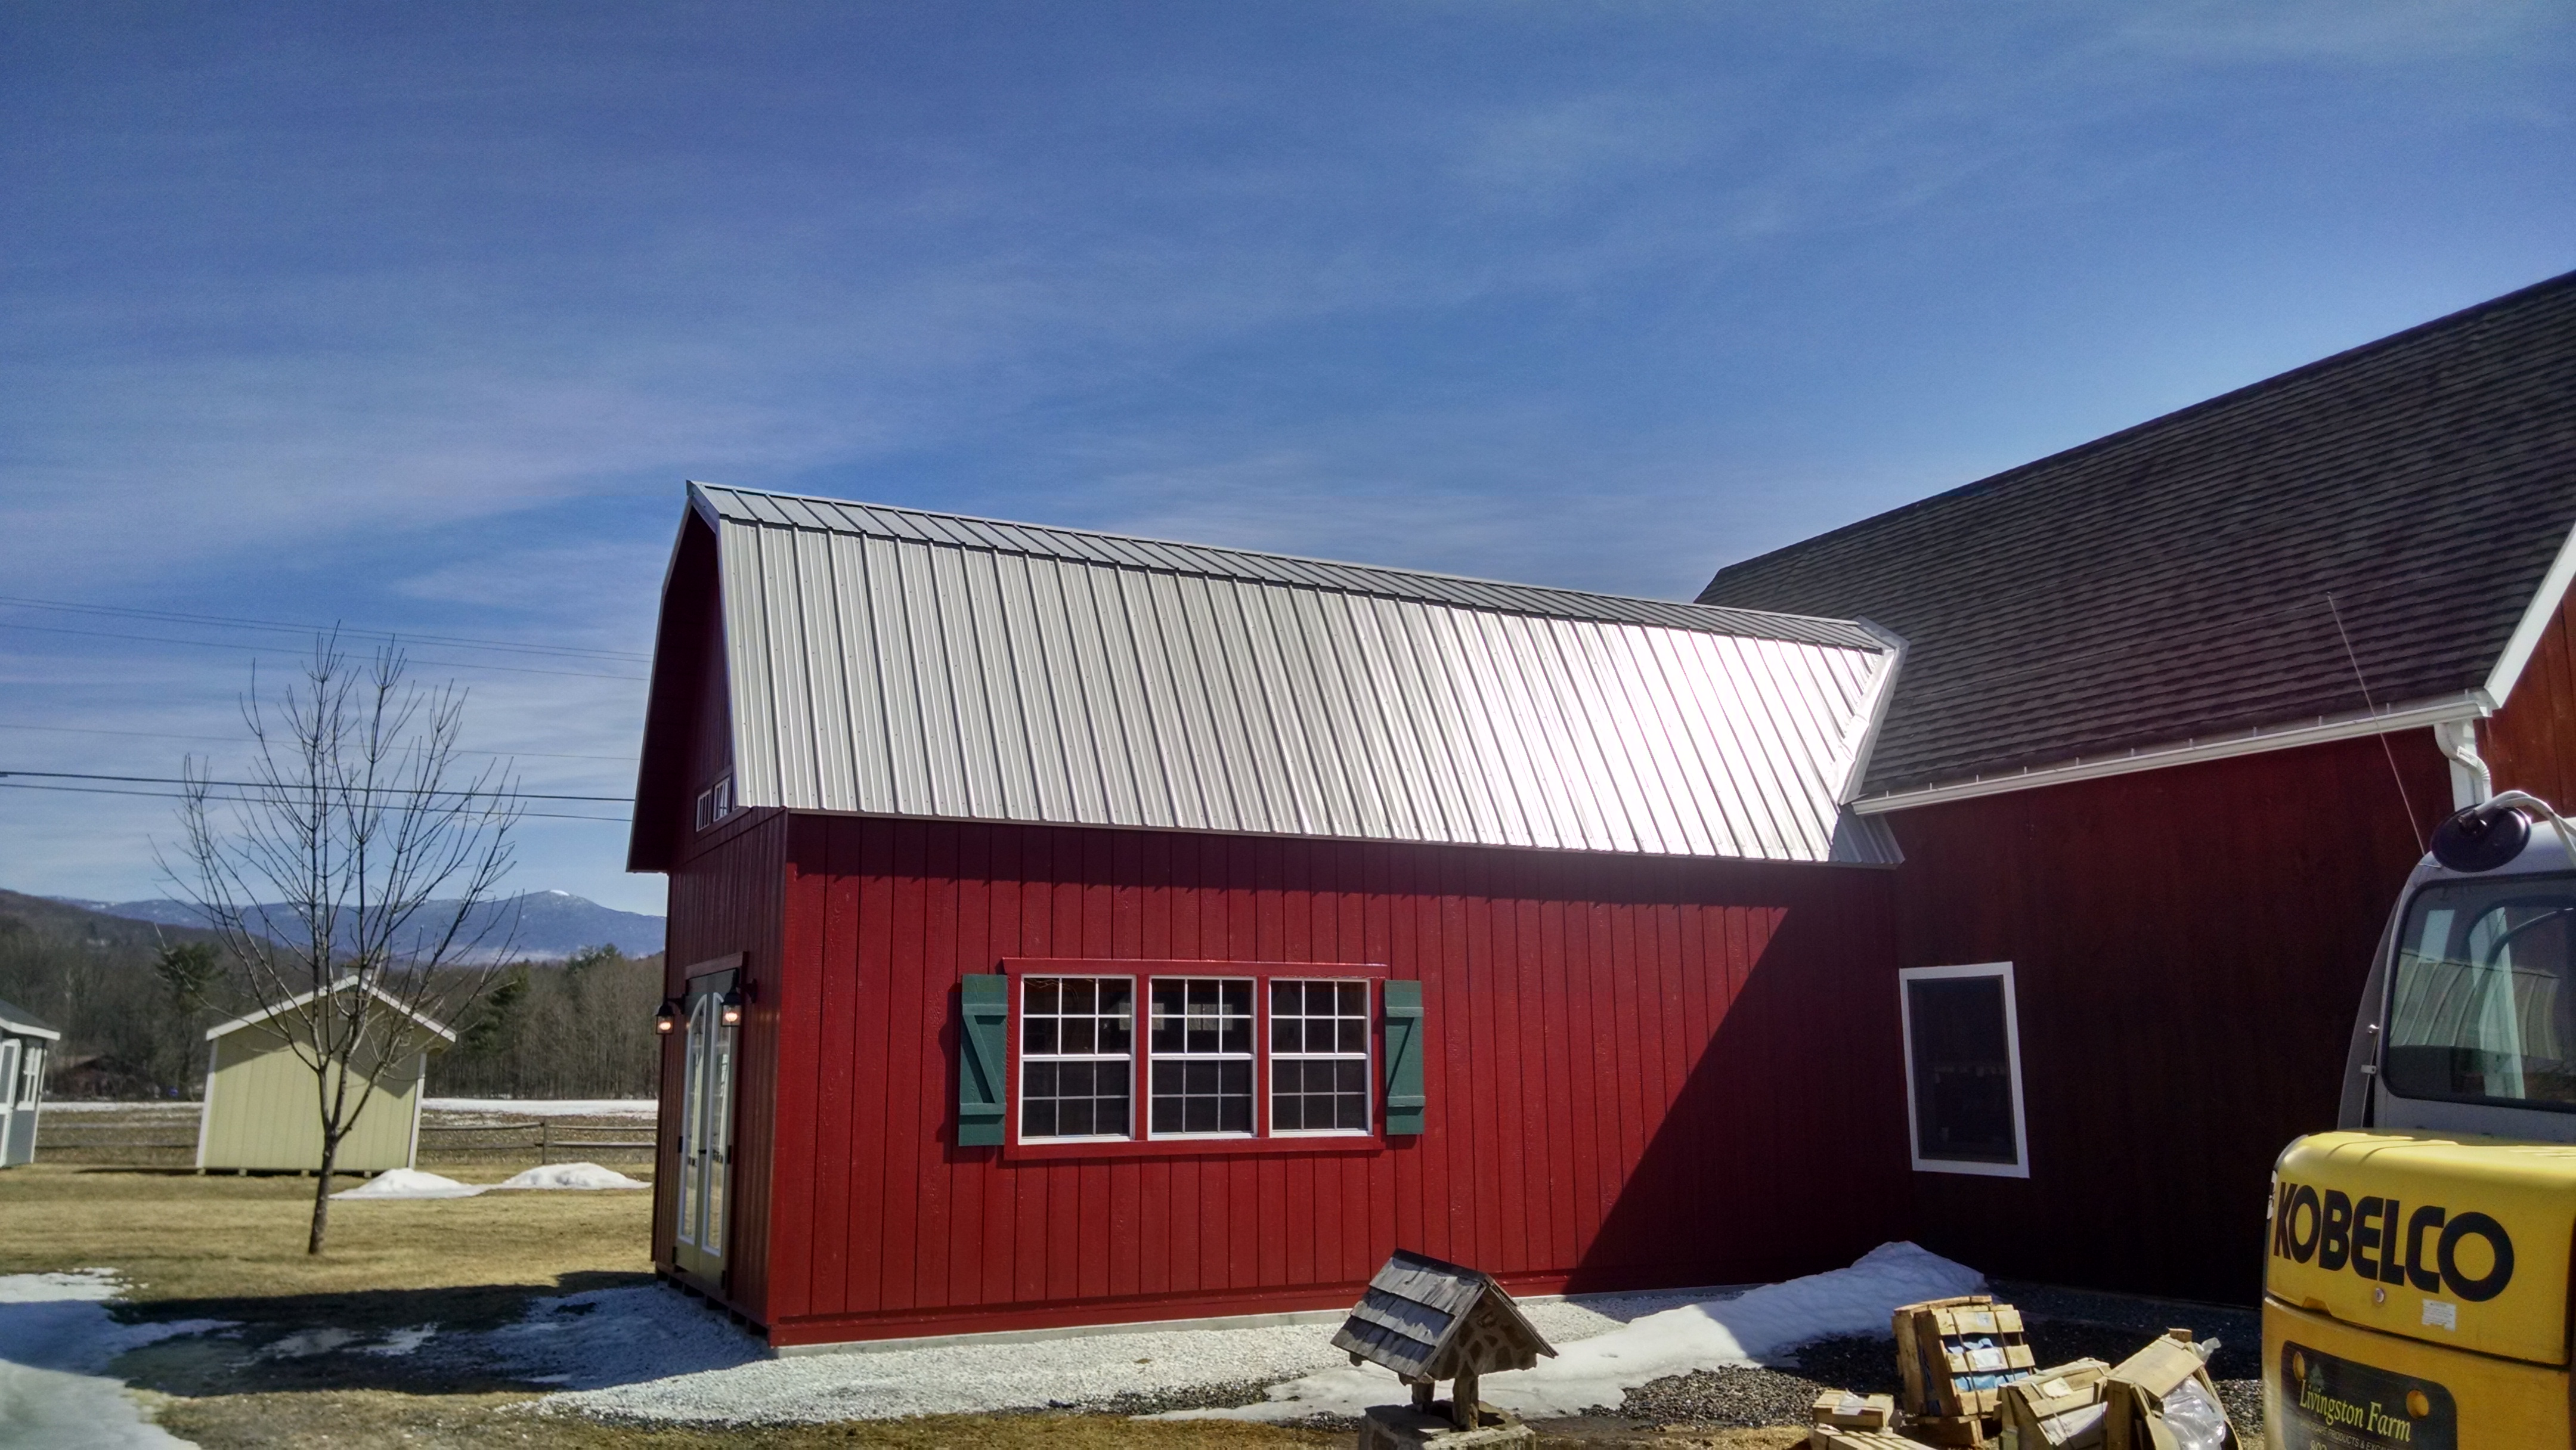
When Livingston Farm of Bristol, Vermont needed more space for our show room, that is exactly what we did. We designed one of our two story building (also know as an outdoor building or sometimes a garden shed or barn) and added on to our existing structure.

Was the process complicated or difficult? Not at all. We didn’t need to sift thru hundreds of articles on home design or hire an expensive architect, then find a reputable builder or general contractor.With time being money, it was a simple and streamlined process that was actually rather fun getting to make decisions on the details we were looking for.
 We sat down with our catalog and picked a style building that complimented our existing structure. Next we designed a floor plan with the features we wanted. We put the order in and a few weeks later our new office addition arrived. Proper drainage was installed and then a concrete foundation for the new addition. With some very clever and skillful maneuvering the building was in place. Once the roof was assembled and the electrical systems were in place (and inspected) the new addition was ready for business.
Whatever your reasons for needing a Home or Office Addition Vermont, they are a wise and economical choice to make. Curious as to what you can do to expand your dwelling space contact us today and one of our experts will happily sit down with you and discuss the possibilities.

where to buy-prefab-buildings-vermont
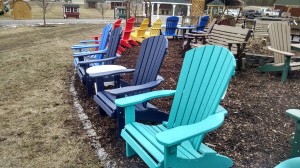
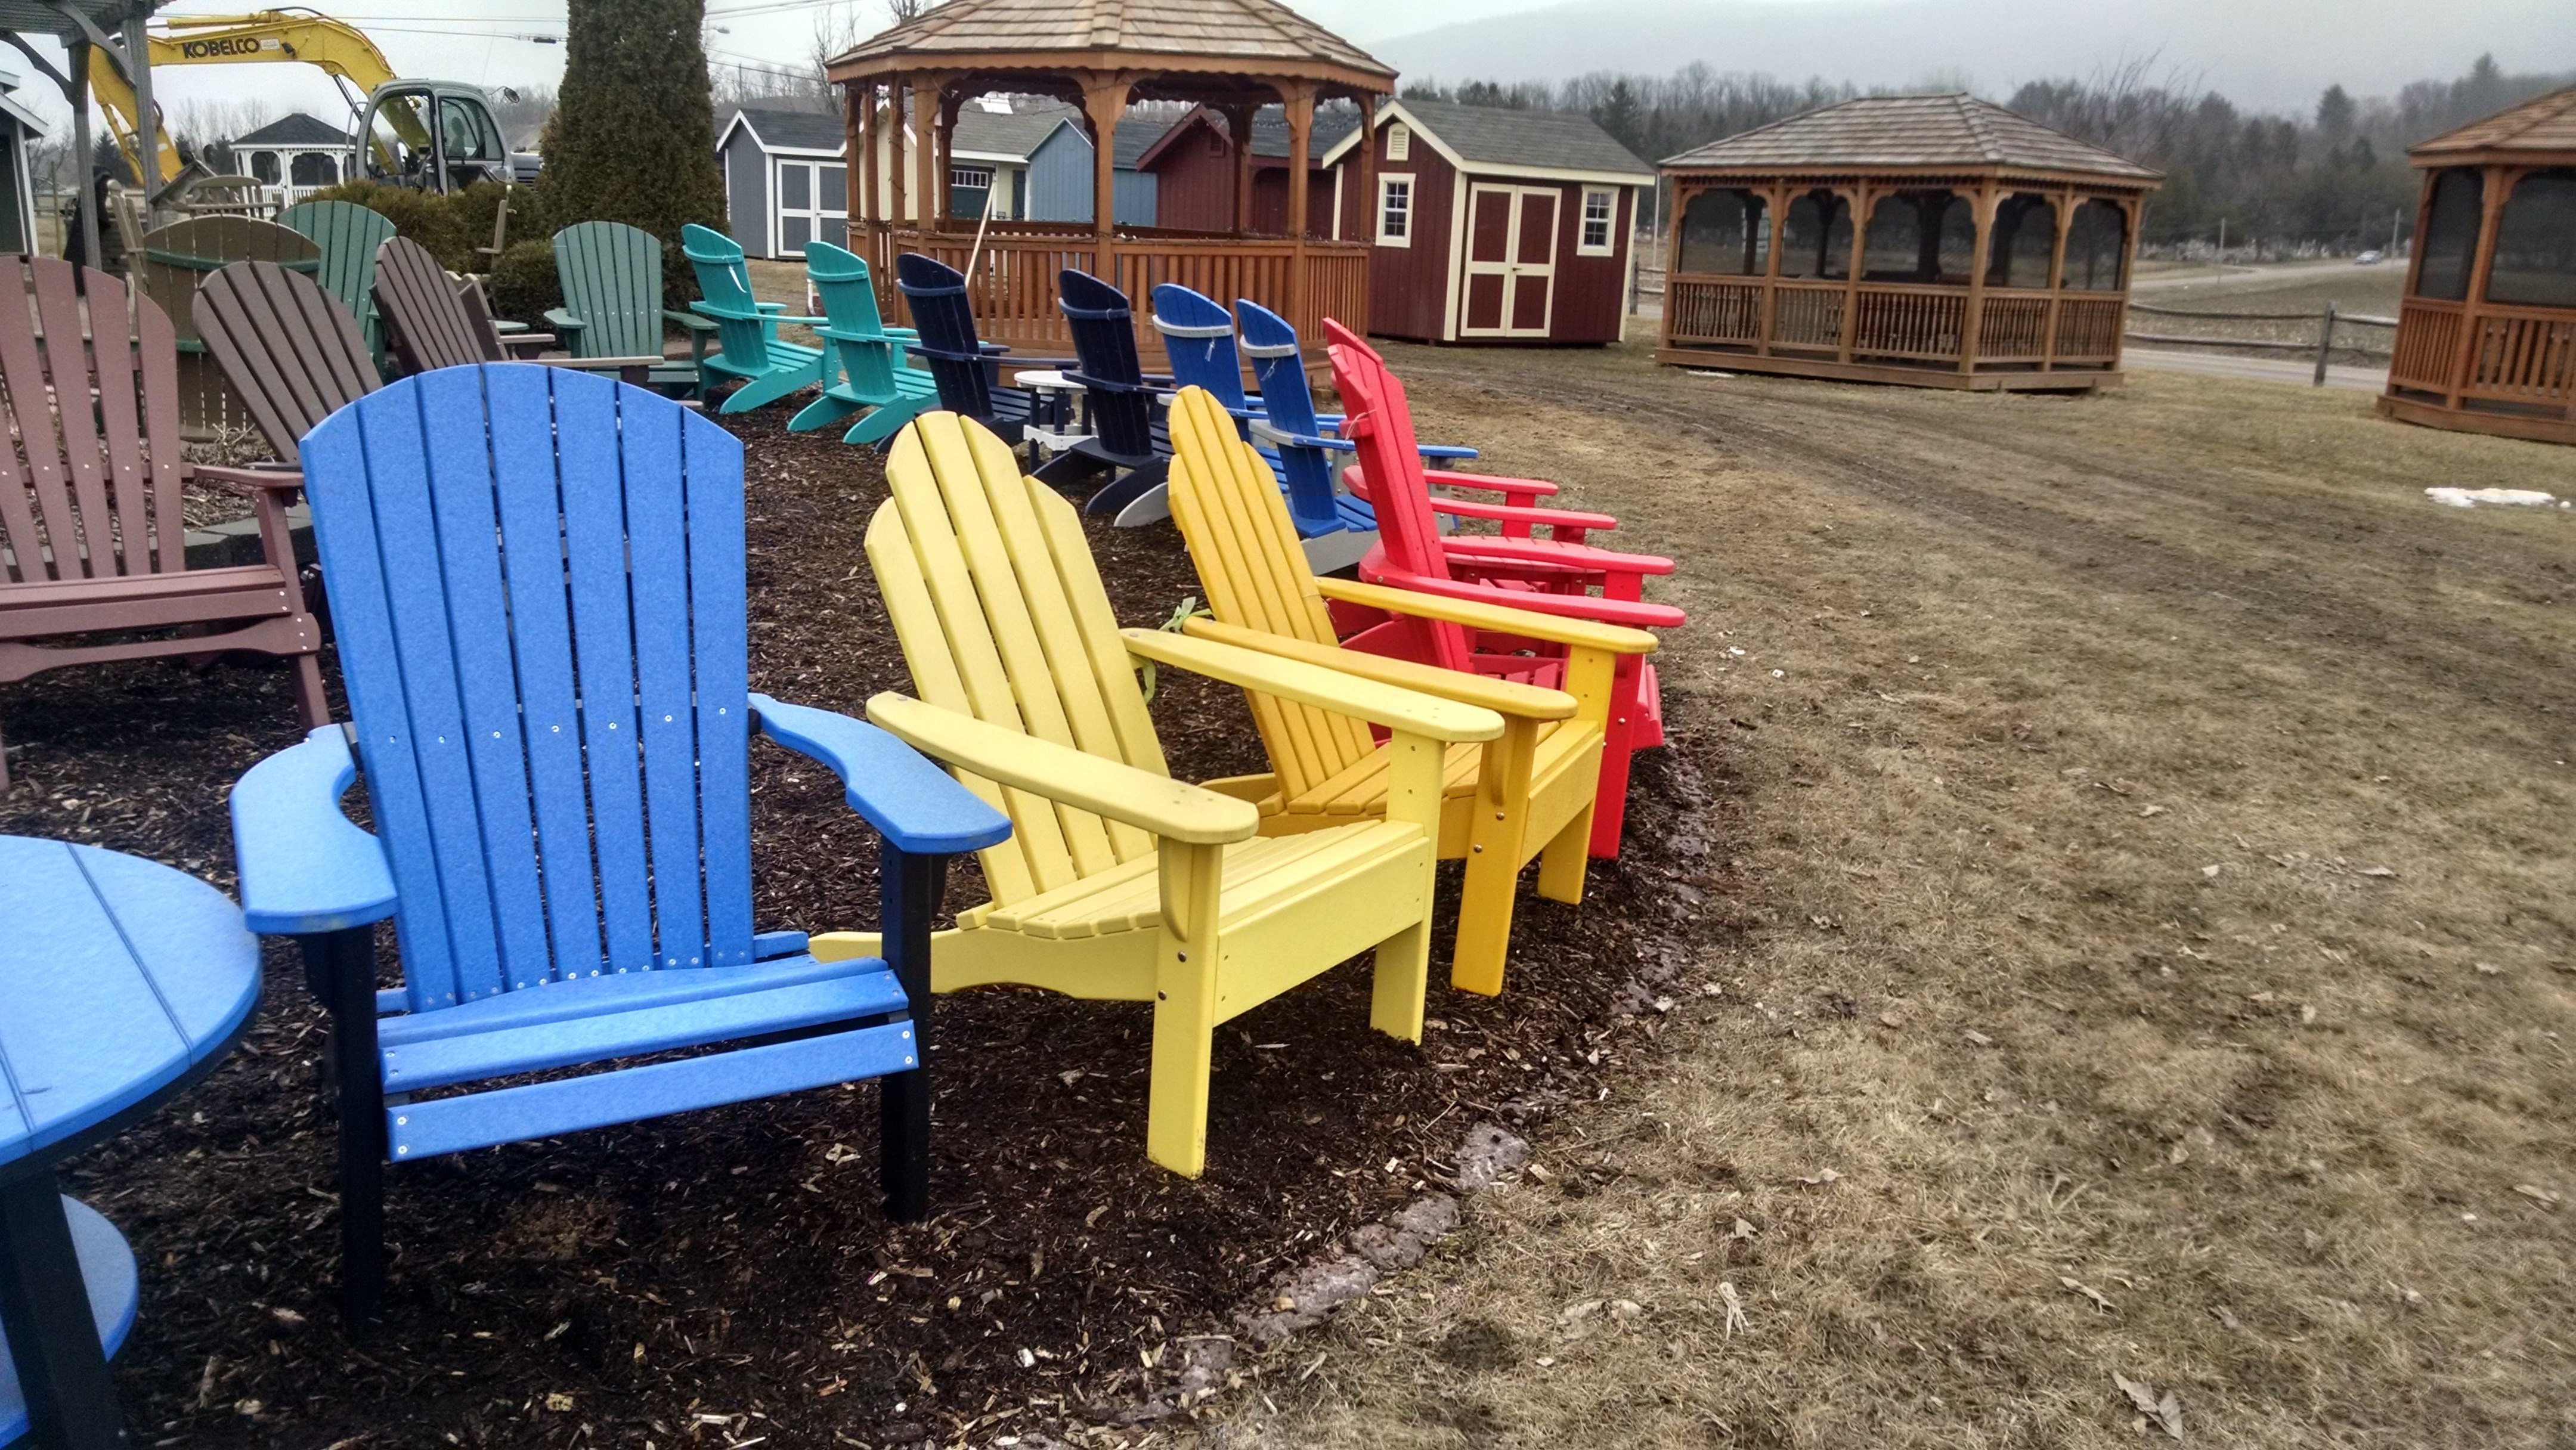
90 Percent Recycled Outdoor Furniture for VT.
90 Percent Recycled Outdoor Furniture
These days everyone is thinking about how to save the planet, save time, save money. And when that is all done we want to be able to relax in comfort. A great way to combine all of these saving efforts and with relaxation in mind, Livingston Farm has a fine selection of 90 percent recycled outdoor furniture. With traditional styles in both standard colors as well as a great selection of colors. From earth tones to vibrant reds and yellows. Dark blues and greens, check out our website livingstonfarm.com or feel free to stop by and try any of our selection out. Have a seat and put your feet up and enjoy.
Unwind at home and feel good about it as you help keep Vermont and the planet green with these 90 percent outdoor furniture. As for maintaining these chairs its as simple as wiping them down with a cloth and soap and water. Not only are they simple to maintain and clean . They are also incredibly durable resisting all that Mother Nature can throw at us here In Vermont or New York and New Hampshire
Curious as to what was recycled to make, for example our Adirondack chairs or rockers. Well it is plastic, like the plastic in milk jugs, actually its just that recycled milk jugs turned into ‘lumber’ and then that lumber is made into for example again an Adirondack Chair or say a Fan back chair. A great use of plastic that keeps it out of landfills and uses it for something relaxing. So when it is time to relax think about our 90 Percent Recycled Outdoor Furniture. Save money and Save the Planet at the same time. How can you lose? See you soon and here is to a happy spring!
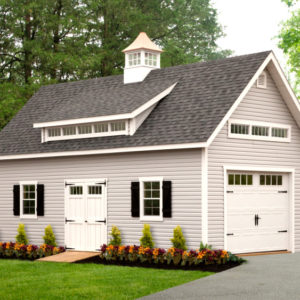
Barn Additions
As we all know or are at least hoping winter is winding down. Time to put away the winter gear and make ready for spring and summer. For farmers it’s time to get equipment in working order for others, time to do things like put away the winter toys. But every year it seems we need a little more room.
If not just for storage than to have some elbow room to work on the spring equipment or store those new skis or that shiny snow machine. Dont want to get a storage space, as you need access to these things. Or maybe its to far away. Perhaps that property needs some functional yet attractive storage options. What ever the reason why not get an addition to your barn or home?
Looks great. Increases your property value and most importantly gets you some much needed room to think and work. Livingston Farm has a wide variety of outdoor structures, that are just perfect for these various needs.
 From Chicken Coops to Garages and yes even buildings that would make a great barn addition . Contact us today and lets explore the possibilities .
The outdoor building in these pictures is what Livingston Farm decided to do when we need more room here at our showroom in Bristol, Vermont. It went in very easily and looks great. Got us the extra room we needed. Not for toys or tractors or other farm gear but as an extra office space. Come visit us and see how it looks and mated with the existing structure. So if you need more space think about an barn addition .


